Prefill Choices in Gravity Form Fields By Adjusting the URL
[November 2023]
A Helpful Hints and Video Tutorial
Have you ever thought to yourself, “If only I could prefill my form to make life easier for website visitors,” then this tutorial is for you! In order for this to work, you need to be able to create a custom link to a page with the form embed. For example, this could be a link you copy and paste into an email or a link from another page on your website to the page with the embedded form.
I am a huge fan of Gravity Forms, so this is the plugin we use in this tutorial.
We use this technique for a lot of reasons in our own business and for clients. Examples can include:
- Directing people to a form in sequence and prefilling name, email, etc to more easily link submissions together.
- Adding buttons for offerings and pre-filling those selections on a form to request more information.
- Sending onboarding forms that are prefilled with conditional fields based on a selected package.
- Prefilling a specific event date/time for a client from a link on an events calendar.
This video gives a tutorial on how to prefill Gravity Form fields, such as radio buttons, checkboxes, and text fields utilizing Parameters and adjusting the URL.
Access the Gravity Forms Export Template
Step 1:
The first step is to start building a form. I’m assuming already have one built with your desired fields 🙂
Step 2:
The second step is to make sure your form field elements are set up allow the field to be populated dynamically.
In your gravity form field element, click the Advanced Tab, select Allow Field to Be Populated Dynamically, and enter a value as the Parameter Name.
Tip: We typically keep the parameter name values short and simple. Rather than first_name, for example, you can simplify with fname.
Step 3:
To call this parameter, simply adjust the URL in the link or button to the page with the following sequence.
https://domain.com/?parameter1=valuea
For multiple parameters to prefill, utilize “&”:
https://domain.com/?parameter1=valuea¶meter2=valueb
If your parameter value is 2 words, use “+” between the words:
https://domain.com/?parameter1=first+second
For Checkbox options/values, seperate multiple selections with commas and no spaces. “include=item1,item2,…”
https://domain.com/?checkbox=option1,option2,option3
A simplified, example form we use for client onboarding is:
https://craftedplugins.com/example-form/?fname=Caitlin&lname=McDonald&email=hello@craftedplugins.com&company=Social+Speak&include=fb,fbads,gads,yt,ig&price=2500
This is referenced in the updated video, as well!
Troubleshooting:
Common errors occur when the value, in a radio button option, for example, is not written exactly as it appears in the form. Capitalization, for example, needs to be aligned.
Additionally, make sure the spelling of the parameter is correct.
Please reach out if you need any help with website development or Gravity Forms!
Additional Transcript:
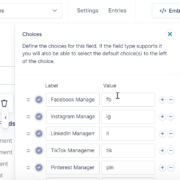
0:00 Hey there, Caitlin McDonald, Social Speak Network and in this video we are going to be doing an updated view of how to add fields that can be prefilled based on parameters. 0:14 In a URL to gravity forms. So this is a simplified form of a form that we use on socialspeaknetwork.com to collect the onboarding information for new videos. 0:28 So we’re sending it to them after we’ve agreed upon a package and we are trying to get more information from them just so that we’re sure we’re on the same page. 0:38 We also have price fields in here and on our main site have it hooked up. So the first field here is the name and underneath the advanced settings there’s this option allow field to be populated dynamically. 0:56 You can put in first underscore name, F name, L name, last name, one word really it’s up to you. We try and keep these short and simple. 1:06 The next one, email, we know the email address, so same thing here. Under the advanced settings, allow field to be populated dynamically and add the parameter name of email. 1:19 We have the same setup, the text field for the company, the date we have today. Today’s date entered in here as the default value. 1:27 So this isn’t a value that we’re pre-filling in. We’re just setting a default value here. And then we have this multiple checkbox. 1:36 And so this is something we often see a lot of people having questions about how to pre-fill multiple checkboxes. So let’s walk through this. 1:47 So right now we have, I think 14 choices in here. And for each of these, we need to make sure that we can check it off or leave it unchecked in the URL that we’re sending to clients. 2:01 So under advanced, the same thing, allow field to be populated dynamically and add a parameter name here. We just are using include as our parameter name. 2:13 Then if you go to general, what you’ll see is this value for each of the options. So I mentioned this before with last name, first name. 2:22 We try and keep things really simple. So instead of Facebook management, we do FB, IG, LI, tick, Twitter. I’m actually going to remove that. 2:31 We don’t do that anymore, but Pinterest, YouTube, blog, et cetera. So that it’s really easy to create this the parameters in the URL and marketing. 2:44 So we want to make sure that we can pre-fill in the price so that they don’t have to look back through emails to see what we agreed upon and that it’s right there front and center. 2:56 And then again, on the main form. We do have the the strike payment. Now this form, based on the selections here we have other selections that are conditionally formed. 3:12 So target market, so if they select any of these options, then the target market appears. Topics to cover, promotional topics for ads, keywords to consider for SEO. 3:26 So these are just kind of conversation starters that we have with the onboarding for our clients. If we preview the form. 3:37 We can see it looks very simple if you just pull up this page. However, again, if you are clicking through to a few different options. 3:46 Inside. More content will appear here. So let’s go through and see what this actually looks like as we are sending it to clients and what we want to put in the URL in order to make sure that the fields are filled in properly. 4:01 So I am just going to click over here to the form, copy the short code for it and paste in the short code here, and let’s go ahead and publish this just so we can see. 4:29 Great. And so if we view the page, we’ll see all of these fields are showing. And so now we can start putting in the parameters. 4:42 Great. So just to make it easy for me, so I don’t have to flip back and forth between the screens for you. 4:49 So these are just a few of the options. And then the price. We also have F name, L name, company and email. 4:59 So let’s click to update. This one’s more. Okay. And. On this page. Cool. So what we’re going to do is let’s start pre filling this in. 5:22 So question mark. And then we want F name equals Caitlin. And then an ampersand. L name equals equals. McDonald’s. And email equals hello at crafted. 5:48 If I can spell. And company equals social speak. So right here I have two words. So I do a plus sign in between them. 6:07 Let’s do the includes equals. So in order to have multiple items, we separate them by a comma. So let’s do FB, comma FB ads, comma G ads, comma YouTube comma Instagram. 6:28 And then the price. And I’ll put this URL in in that tutorial as well equals, let’s say it’s $2,500. So what I’m going to do is copy this. 6:45 Let’s click to enter it. What we should see is the name filled in company or email company price and then something was It’s happening. 6:57 Here with the check boxes and that is just because I used an S rather than not in the URL. So include versus includes. 7:09 So here now we see the check boxes and then. Thank you. Automatically the fields come up that we want to make sure that they fill out. 7:16 So this is just an example of a form that utilizes the parameters in the URL to make it easier for customers to go through. 7:25 The onboarding process and to make sure we have the information that we need. I’m going to pull up now a couple other one more example for a client that uses this to pre fill in group program names. 7:39 Or website visitors so that they can more easily sign up for a group program. One of her services. So let me quickly pull that up. 7:48 Okay so this is a client’s website and they have a form for people who download and read this PDF to complete and you’ll see in this form we pre-fill in the option that they’ve been just reading so that they can mark it complete and so the month completed right here pre-fills into November 2023 and then 8:14 we also have it because this is a gated form and I am logged in and members have to be logged in. 8:22 It also does pre-fill in the name and then also the center that I work at from my profile. These are just a few examples of how you can utilize a URL in a for a Bye-bye. 8:41 Page that has a form on it in order to simplify the process of filling out that form and making sure that information is there that should be there for a client to keep them from getting confused. 8:53 Or just to streamline the process a little bit for them. I hope this has been helpful. Take a look at the other tutorials that we have at CraftedPlugins.com as well as our main website socialspeaknetwork.com. 9:06 Thank you so much.
//  Remove Addtional Info tab From Single product Page
     add_filter( 'woocommerce_product_tabs', 'bbloomer_remove_product_tabs', 9999 );
          function bbloomer_remove_product_tabs( $tabs ) {
             unset( $tabs['additional_information'] );
              return $tabs;
         }

